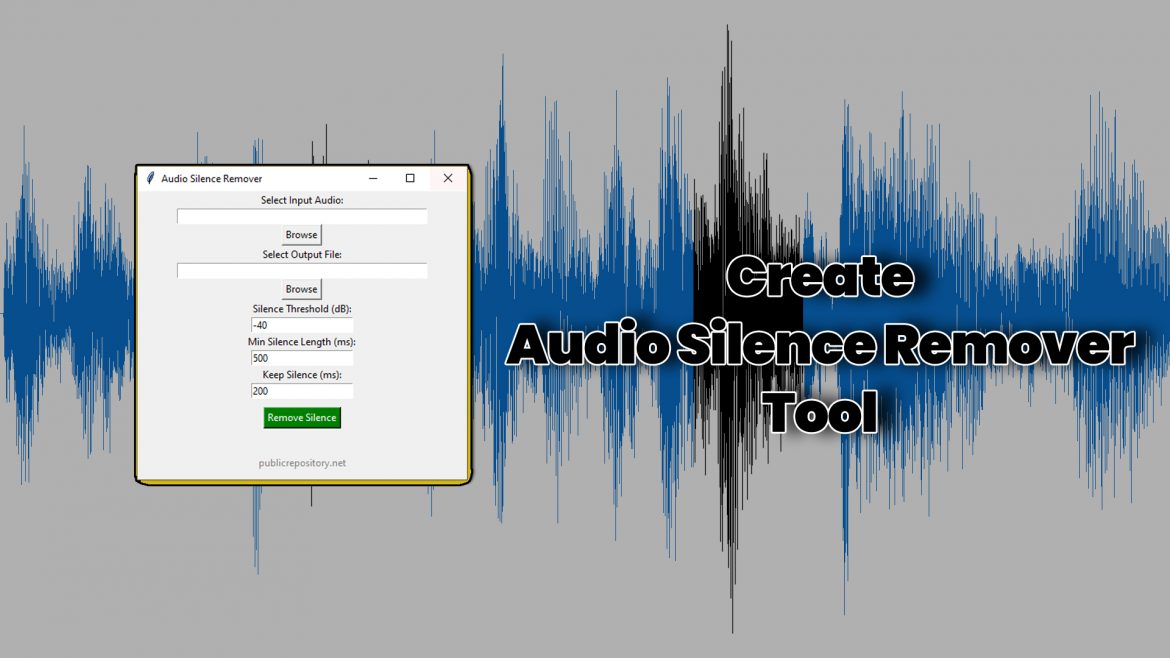
In the world of audio and video editing, removing the silent parts from an audio file is a crucial step in optimizing audio recordings. Whether it is a podcast, music, or the audio of content creation, eliminating unwanted silent parts can enhance the flow and engagement of video and audio content. So, we are going to create a Python-based tool, which allows the user to remove silent parts from the audio easily and improve its potential.
So,
how do we build the tool using Python?
The silence remover is developed using the Python language with the library pydub to process the audio and Tkinter for the graphical user interface. To create the tool, you need to follow these steps:
Loading the audio
– The user selects an input file in the form of MP3, WAV, or FLAC. After this, the tool detects the silent parts using `pydub.silence.detect_nonsilent()` to identify the non-silent segments of the audio. Then, the trimming of the silence is done. The detected segments are merged, ensuring smooth transitions by keeping a small portion of the silent parts of the audio. Then, we need to save the generated audio into MP3 format.
The main component
required to create this is pydub, which handles major audio manipulations. To create a user-friendly GUI, Tkinter is used, and with the help of file dialogues, the user can select input and output files using input fields. There is also an option to set the silence threshold of the MP3, its retention, and the minimum silence required to be removed from the audio file.
How to use this tool
– Launch the application by running the Python script or the .exe generated. Select an audio file using the browse button in the tool, then choose where the audio will be saved after processing. You can manually adjust the silence detection settings – silence threshold, which determines what is considered to be silent parts in the audio, minimum silence length, which is the duration that qualifies as silence, and keep silence, which specifies how much silence should be kept at the cuts. Then, click the remove silence button, which processes the audio and saves it in the destination file.
With the help of this tool
, the audio flow can be improved by removing unnecessary silence and pauses in the audio, and it will help to save editing time and eliminate the manual process of removing silent parts. The software is easy to use, and users have customization options available, allowing them to fine-tune the silence detection through the settings. It is open-source and free, with no limitations and no subscription or license fees required. One can make this tool and use it forever with unlimited usage.
Potential future updates
– This tool can be further enhanced by adding more formats and compatibility for other audio formats. It can be converted into a batch processing tool, enabling silence removal from multiple audio files at once. The update can include preview and undo options, allowing users to listen to or preview the output before saving.
Different features that can be further added are
background noise reduction, which can help remove unwanted background noises. It can also be updated with volume normalization, which helps to keep the volume level consistent across the complete audio. You can also add a feature of speech-to-text conversion, which will be helpful to convert the spoken audio into text within the tool. The tool can also support multiple export options.
Code Explained
1. Import Required Libraries
import os
import tkinter as tk
from tkinter import filedialog, messagebox
from pydub import AudioSegment
from pydub.silence import detect_nonsilent
2. Function to Remove Silence
def remove_silence():
3. Validate User Inputs
if not input_file.get():
messagebox.showerror(“Error”, “Please select an input audio file.”)
return
if not output_file.get():
messagebox.showerror(“Error”, “Please select a destination file.”)
return
4. Fetch User Settings
try:
silence_thresh = int(thresh_entry.get())
min_silence_len = int(min_len_entry.get())
keep_silence = int(keep_entry.get())
except ValueError:
messagebox.showerror(“Error”, “Please enter valid integer values for silence settings.”)
return
5. Load and Process Audio File
audio = AudioSegment.from_file(input_file.get())
non_silent_ranges = detect_nonsilent(audio, min_silence_len=min_silence_len, silence_thresh=silence_thresh)
6. Remove Silence and Reconstruct Audio
processed_audio = AudioSegment.empty()
for start, end in non_silent_ranges:
processed_audio += audio[start – keep_silence:end + keep_silence]
7. Save Processed Audio File
processed_audio.export(output_file.get(), format=”mp3″)
messagebox.showinfo(“Success”, “Silence removed successfully!”)
8. Function to Select Input File
def select_input_file():
file_path = filedialog.askopenfilename(filetypes=[(“Audio Files”, “*.mp3 *.wav *.flac”)])
input_file.set(file_path)
9. Function to Select Output File
def select_output_file():
file_path = filedialog.asksaveasfilename(defaultextension=”.mp3″, filetypes=[(“MP3 Files”, “*.mp3”)])
output_file.set(file_path)
10. Create GUI Window
root = tk.Tk()
root.title(“Audio Silence Remover”)
root.geometry(“400×350”)
11. Define Input and Output File Paths
input_file = tk.StringVar()
output_file = tk.StringVar()
12. Add File Selection Buttons
tk.Label(root, text=”Select Input Audio:”).pack()
tk.Entry(root, textvariable=input_file, width=50).pack()
tk.Button(root, text=”Browse”, command=select_input_file).pack()
13. Add Silence Settings Fields
tk.Label(root, text=”Silence Threshold (dB):”).pack()
thresh_entry = tk.Entry(root)
thresh_entry.pack()
thresh_entry.insert(0, “-40”)
14. Add Remove Silence Button
tk.Button(root, text=”Remove Silence”, command=remove_silence, bg=”green”, fg=”white”).pack(pady=10)
15. Add Footer with Branding
footer = tk.Label(root, text=”publicrepository.net”, fg=”gray”)
footer.pack(side=”bottom”, pady=10)
View Complete Code
Save the code in .py file
Creating EXE
Run the following command to generate an EXE file:
pyinstaller –onefile –windowed silence_remover.py
How to use this application
Start the application

Select the source file

Choose the destination folder and enter file name

Use required threshold, length and duration values and click Remove Silence

and it will generate a new mp3 file with silences removed


